Creating an Export with the Wizard
Step through the New export wizard — Type, Scope, Dates or Frequency, and Output — to build a one-off or scheduled export of your records from scratch.
Overview
The New export wizard builds an export from scratch: you choose what kind of export it is, which source and accounts it covers, the period it spans — or how often it should run — and what the file is called. This article walks through each step for a one-off export, then the differences for a scheduled one. The Files and Schedules pages, where the finished exports and the schedules themselves live, are covered in Exports; for what each file format contains and when to choose it, see Export formats and contents.
How to Get There
- Click Exports in the left sidebar, then Files
- Click New export at the right of the toolbar — or New schedule on Schedules, which opens the wizard with Scheduled export already chosen
Stepping Through the Wizard
Click New export on Files (or New schedule on Schedules). The wizard walks through four steps with a progress bar across the top: Type, Scope, Dates (or Frequency for a scheduled export) and Output. Back and Next move between them, and nothing is created until you click Create export on the last step. The only way out is the × at the top right, which abandons the export — clicking the dimmed page behind the wizard does nothing, so a part-filled export cannot be lost by a stray click. You can also click an earlier step on the progress bar to go back to it.
1. Type
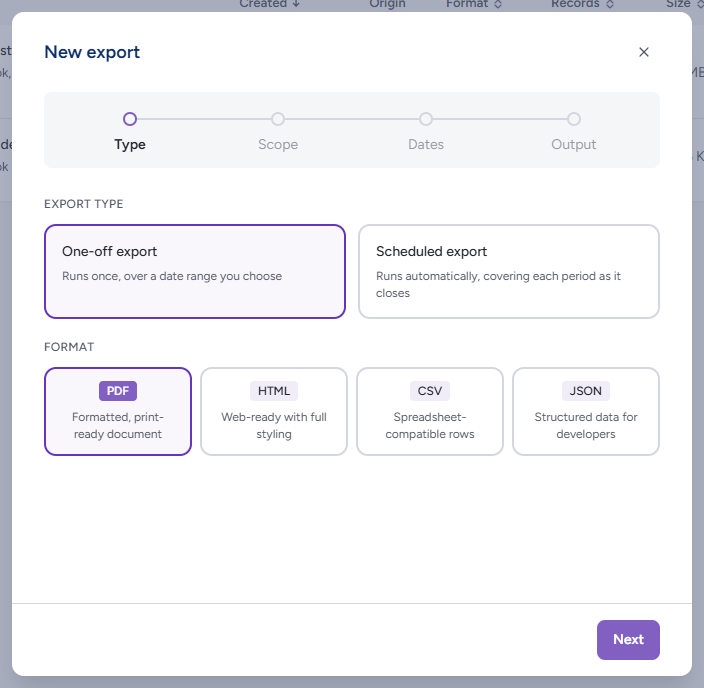
Under Export type choose:
- One-off export — "Runs once, over a date range you choose"
- Scheduled export — "Runs automatically, covering each period as it closes"
Then pick a Format. It opens on PDF:
- PDF — formatted, print-ready document
- HTML — web-ready with full styling
- CSV — spreadsheet-compatible rows
- JSON — structured data for developers
Every export carries everything it can hold — the comments thread, every captured version, metadata, media, your notes and tags, and sentiment where your organisation has the Insights add-on — so there is no step for choosing inclusions. CSV leaves out media, since a spreadsheet cannot carry it. See Export formats and contents for help choosing.
2. Scope
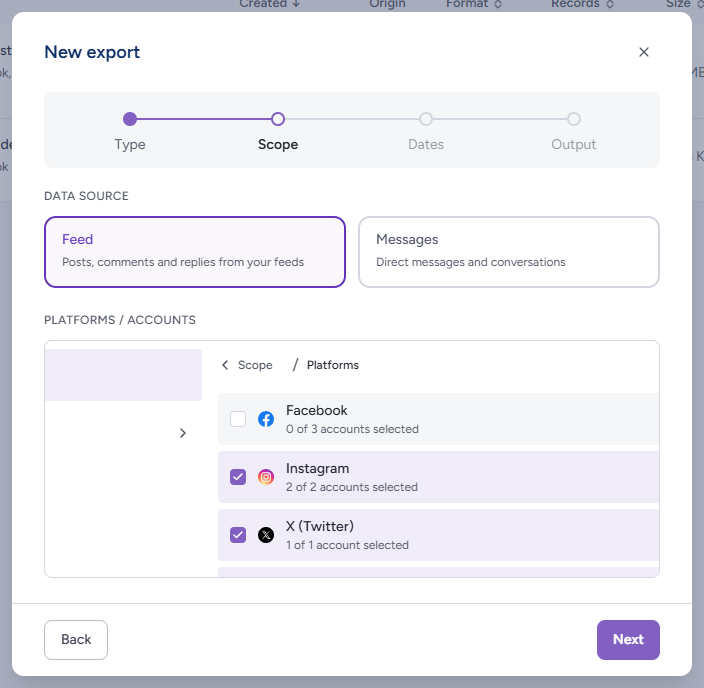
- Data source — Feed ("Posts, comments and replies from your feeds") or Messages ("Direct messages and conversations"). An export covers one or the other; set up two exports if you need both
- Platforms / Accounts — All accounts ("Every connected channel for this source") is selected to begin with. Choose Choose accounts ("Pick the platforms and accounts to cover") to narrow it. The Platforms list shows each platform with a checkbox and how many of its accounts are selected ("2 of 2 accounts selected"); tick a platform to take all of its accounts, or open it with the arrow to tick individual accounts, with Select all for that platform and a Back to platforms link at the top
If you choose Choose accounts and tick nothing, Next stops you with "Please select at least one platform or account to continue."
Messages are archived from Facebook only, so a Messages export offers only Facebook channels with message archiving enabled.
3. Dates (one-off)
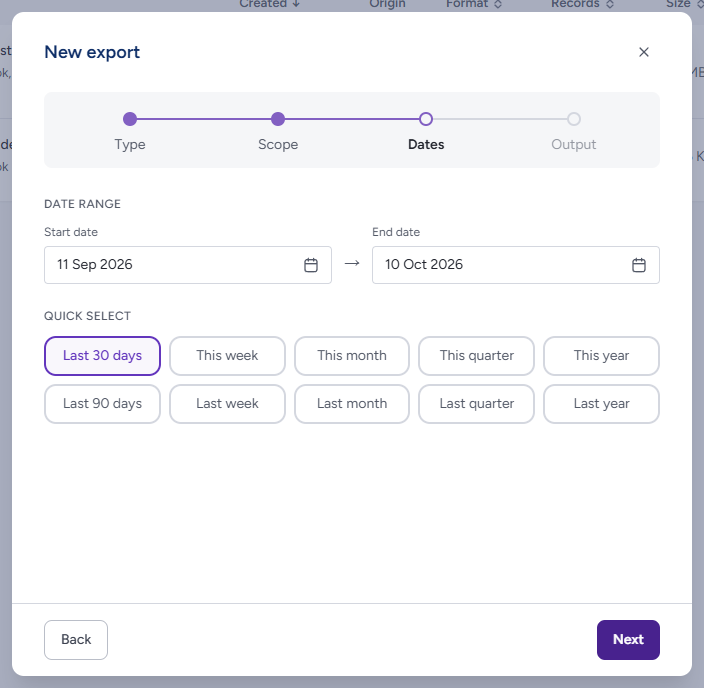
Under Date range, set a Start date and End date — each field opens a calendar on the end it names and moves only that end — or use Quick select: Last 30 days, This week, This month, This quarter, This year, Last 90 days, Last week, Last month, Last quarter or Last year. The wizard opens on the last 30 days.
3. Frequency (scheduled)
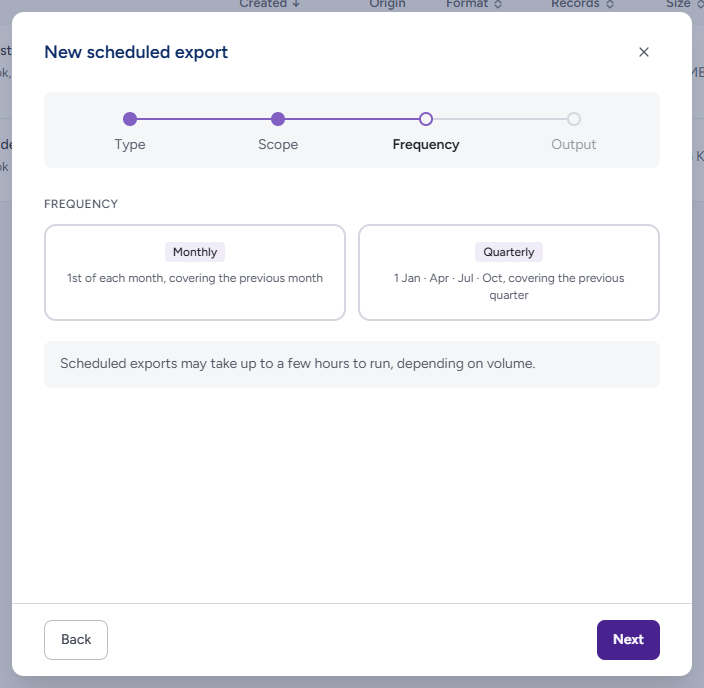
For a scheduled export this step replaces Dates. Choose:
- Monthly — "1st of each month, covering the previous month"
- Quarterly — "1 Jan · Apr · Jul · Oct, covering the previous quarter"
Nothing is selected to begin with; Next without a choice shows "Please choose how often this export should run." The note beneath reminds you that scheduled exports may take up to a few hours to run, depending on volume.
4. Output
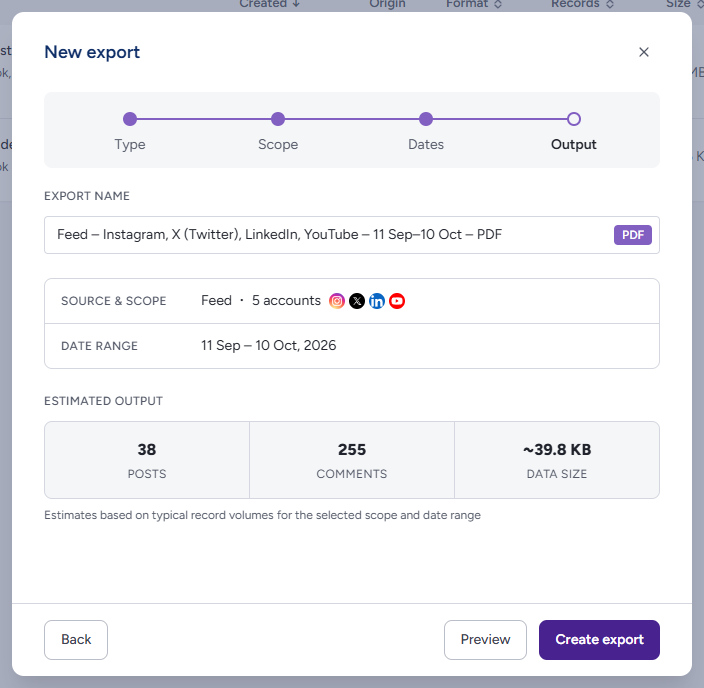
- Export name — arrives as a suggestion built from your answers (source, platforms, period and format) and keeps tracking your answers until you type. Edit it to anything you like — a case number, for example. The chosen format is shown as a pill at the end of the field, and the name cannot be left blank ("Please name this export to continue.")
- Source & scope and Date range — a read-only summary of the earlier steps. Use the progress bar or Back to change them
- Estimated output — Brolly estimates the number of posts and comments (or conversations and messages for a Messages export) and the data size for that scope and period. The figures are an estimate, not a count of what the file will contain; if the estimate cannot be fetched the panel reads "Estimates are unavailable right now — the export itself is unaffected". When the estimate is over the export service's size ceiling (5 GB by default) the panel warns you, naming both figures. Create export stays enabled, but the export service makes the final decision and may refuse the request, in which case the reason is shown; narrow the accounts or dates, or split the request into two exports
Click Create export (it reads Creating… while the request is sent). The wizard closes, the export appears under Files as Queued, and the export activity panel follows it from the bottom of the screen; large exports can take a few minutes, and the Status column updates when the file is ready to download. If the request is rejected the wizard stays open and shows the reason above the buttons.
Creating a Scheduled Export
The same wizard, titled New scheduled export, with three differences:
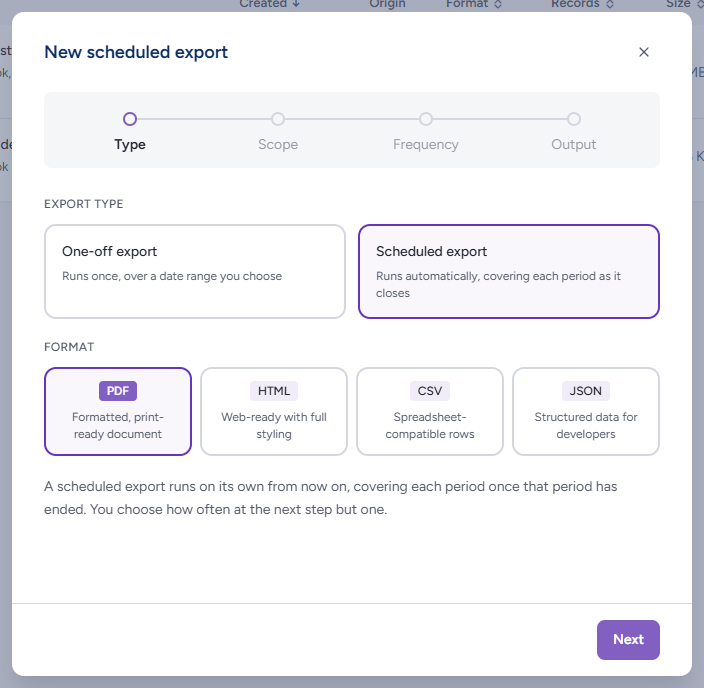
- On Type, choosing Scheduled export adds a note beneath the format tiles: "A scheduled export runs on its own from now on, covering each period once that period has ended. You choose how often at the next step but one." The third step on the progress bar changes from Dates to Frequency
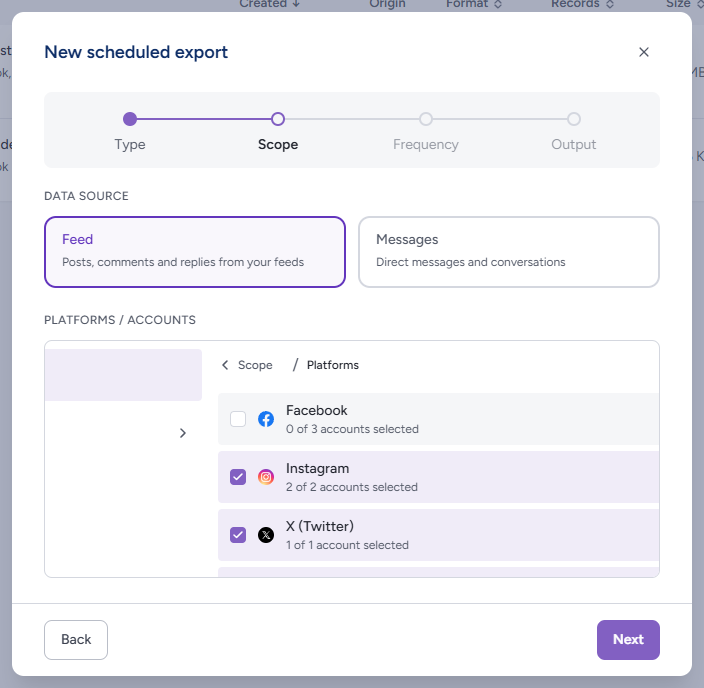
- Scope is the same as for a one-off export; the accounts you choose here are what the schedule covers on every run
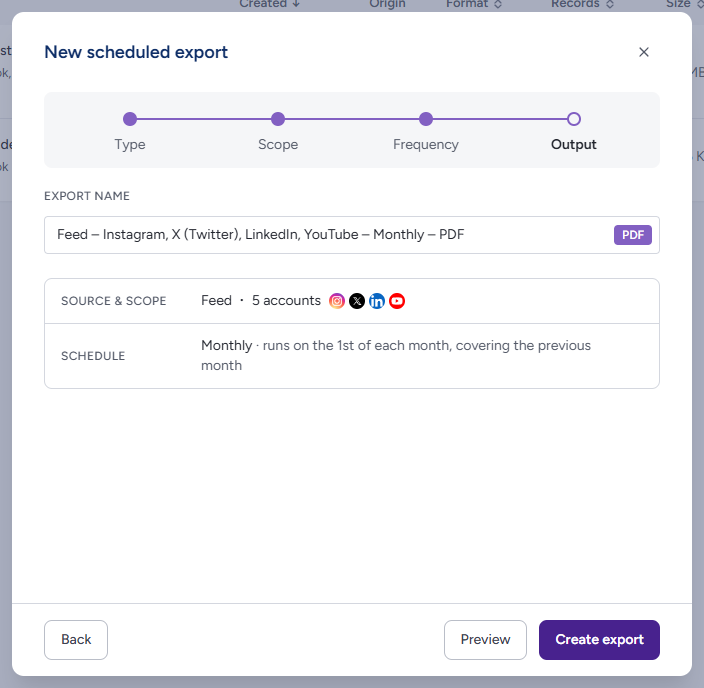
- On Output, the summary shows a Schedule row — "Monthly · runs on the 1st of each month, covering the previous month", or the quarterly equivalent — in place of a date range, and there is no estimate, since each run covers its own period. The suggested name names the frequency rather than a date span
Click Create export and the schedule appears under Schedules. Its first file arrives under Files after the first period closes, with Scheduled as its origin. Modifying or deleting a schedule once it exists is covered under Schedules.
Tips
Leave the suggested Export name alone unless you have a better one — it records the source, platforms, period and format, which is exactly what you will want to see in the Files list later.
If the Estimated output on the last step is far bigger than you expected, go back to Scope or Dates and narrow it rather than creating the export and waiting on it.