Managing Groups
Permission groups connect accounts to people: create groups, add members, and control which team members see which social media accounts.
Overview
Permission groups decide who sees what. Every social media account belongs to one group, every team member belongs to one or more, and members see the records of the accounts in their groups. Use groups to separate departments, regions, clients or individual elected officials inside a single Brolly organisation, so each team only sees the accounts that are theirs.
How to Get There
- Click Settings in the left sidebar
- Click Groups beneath it
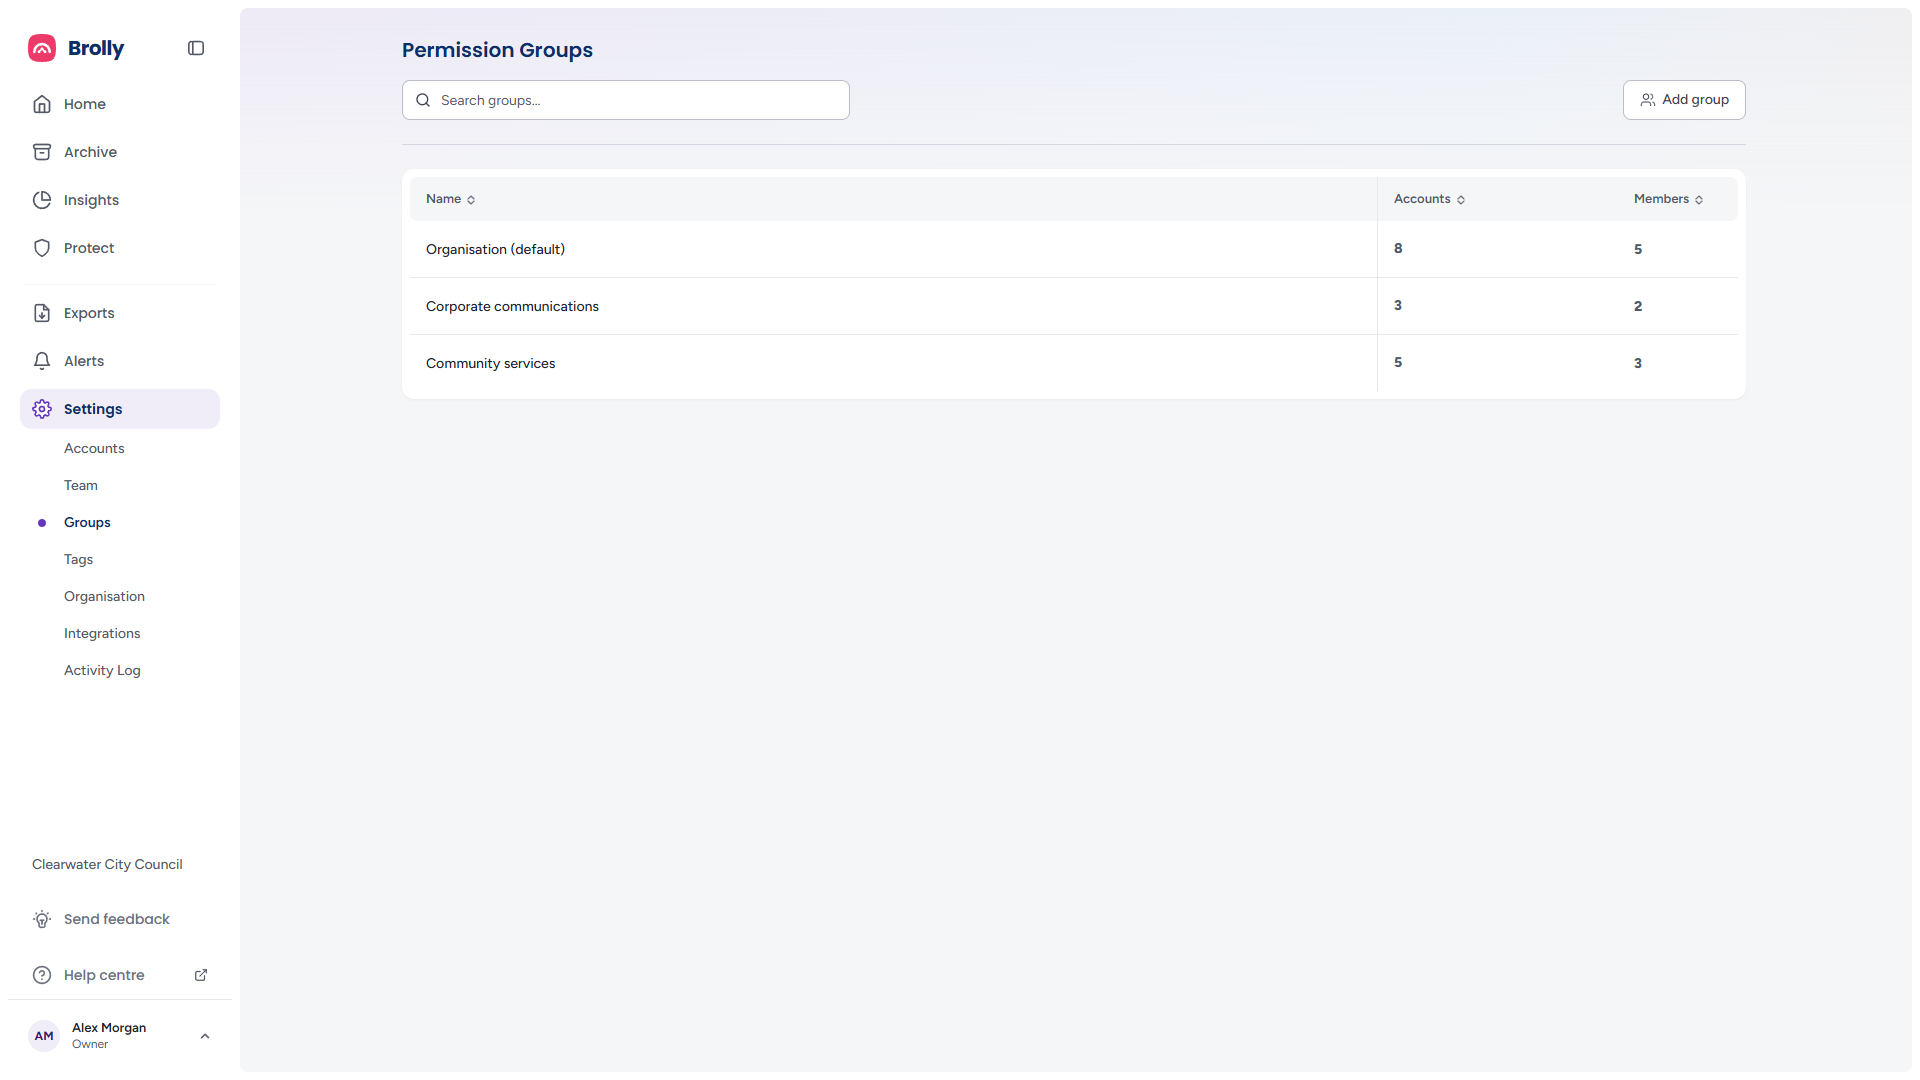
The Toolbar and Table


- Search groups… — find a group by name; the list narrows as you type, and a Clear button appears while a search is set
- Add group — create a new group (see below)
Each group shows its Name, how many social Accounts it contains and how many Members belong to it. Click a heading to sort, and click a row to open the group.
If a search matches nothing, the table shows No groups found — "“regional” didn’t match any groups." — with Clear search and a Create “regional” group link that opens the create dialog with that name filled in. An organisation with no groups yet (only possible before the default group exists) sees No permission groups yet with an Add group button.
The Default Group
Every organisation has Organisation (default). It holds every account and every member of the organisation — in the table its counts match your totals — so anyone in it sees everything. Newly connected accounts and newly invited members land there unless you choose another group, and it cannot be renamed: its drawer has no Edit name button.
Organisations Without the Groups Add-on
Groups are an optional add-on (see Your Plan, Trial and Add-ons). An organisation without it has exactly one group, so the group controls are not shown at all: there is no Groups page under Settings, no Group column or filter on Team and Accounts, no Groups card in the account and member drawers, and no group picker when inviting someone. Everything lands in the one group, and inviting people or changing their role works as normal.
Creating a Group
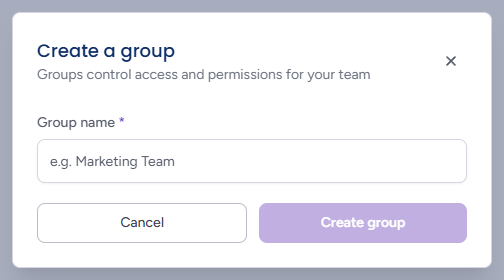
- Click Add group — the Create a group dialog opens ("Groups control access and permissions for your team")
- Enter a Group name (required — the field has a red asterisk and Create group stays greyed out until something is typed)
- Click Create group, or Cancel
The button reads Creating… while the group is made, and the dialog closes only once Brolly has confirmed it; if the request fails, the reason appears in red beneath the field and the dialog stays open. Clicking the dimmed page does not close it (so a typed name is not lost) — use Cancel, the × or Escape.
Then open the group to add people to it, and move accounts into it from their own drawers (see below).
The Group Drawer
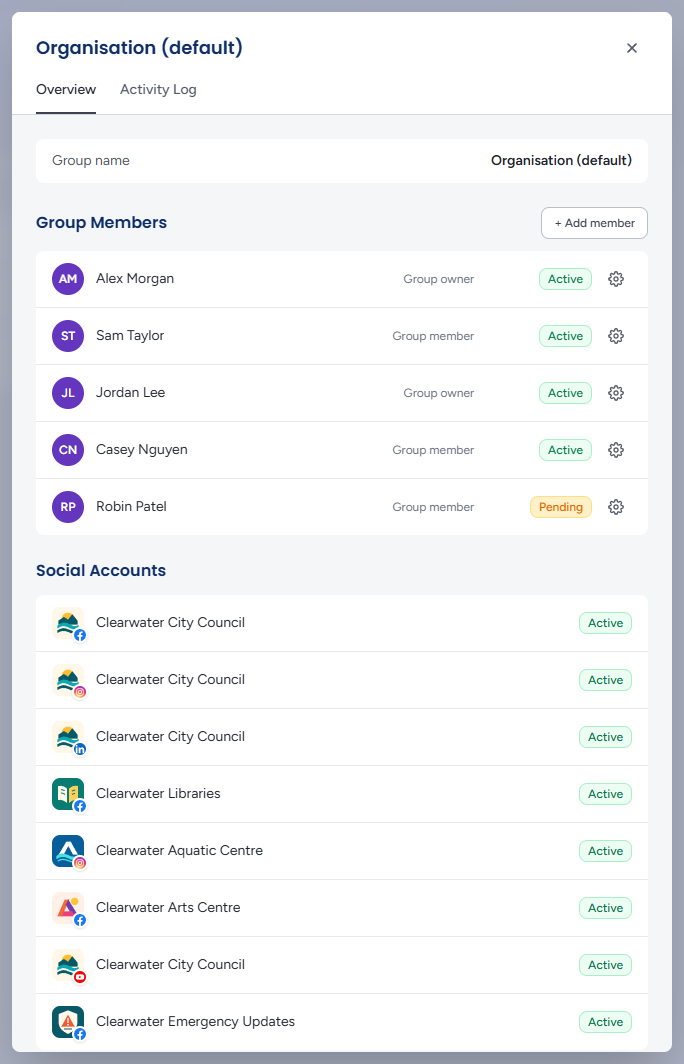
Clicking a group slides a panel in from the right with the group's name at the top and two tabs, Overview and Activity Log. Close it with the ×, Escape or a click on the dimmed page. The open group and tab are kept in the page's address. While the group's details load, the panel shows a spinner; if they cannot be loaded it says "Failed to load group data" with the reason.
Overview
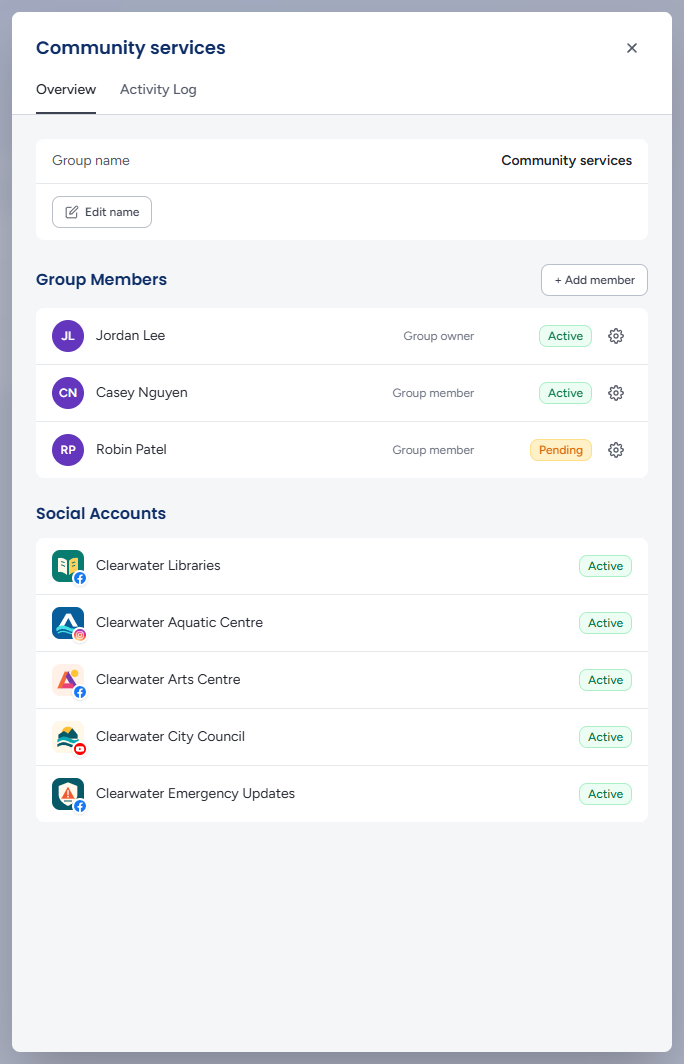
- Group name — with Edit name to rename it in place (not shown for the default group)
- Group Members — everyone in the group, each with their group role (Group owner or Group member), their status badge (Active, Pending or Inactive) and a cog for their settings in this group. "No members have been added yet." when it is empty
- Social Accounts — the accounts whose records this group can see, each with its platform icon and status (Active, Pending, On hold, Token expired or Does not exist). "No channels have been connected yet." when it is empty
Renaming a Group
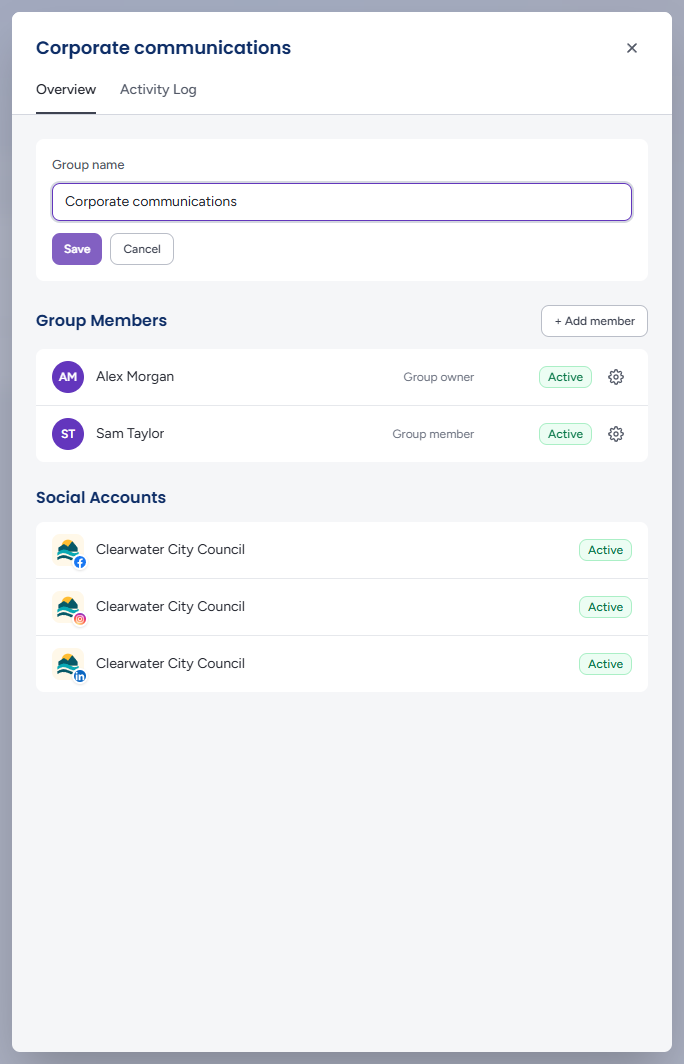
Click Edit name; the name becomes a text box with Save and Cancel. Enter saves, Escape cancels (a second Escape closes the drawer). A blank or unchanged name is ignored.
Adding Members
+ Add member invites a new person straight into this group — it opens the same Create new user account form as the Team page, with the Group field fixed to this group (shown greyed out) instead of a picker. The System Role you choose there sets their role in this group: Owner makes them a Group owner, View only a Group member.
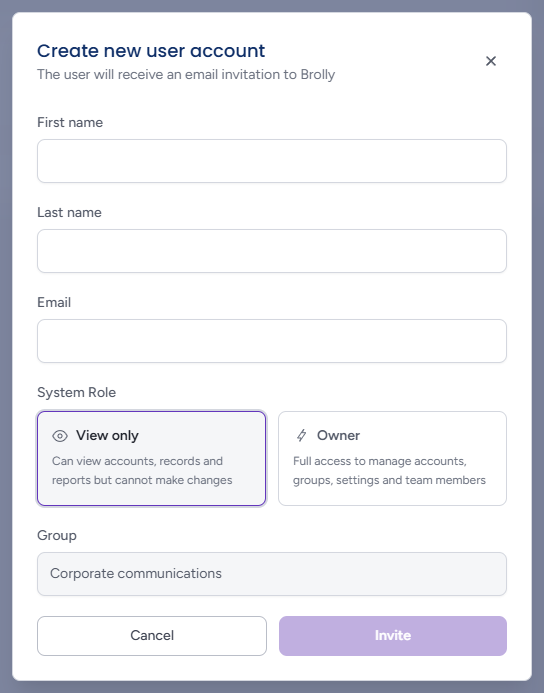
To add an existing team member to a group, open them on the Team page and use + Add group — see Managing Team Members.
Member Settings Menu
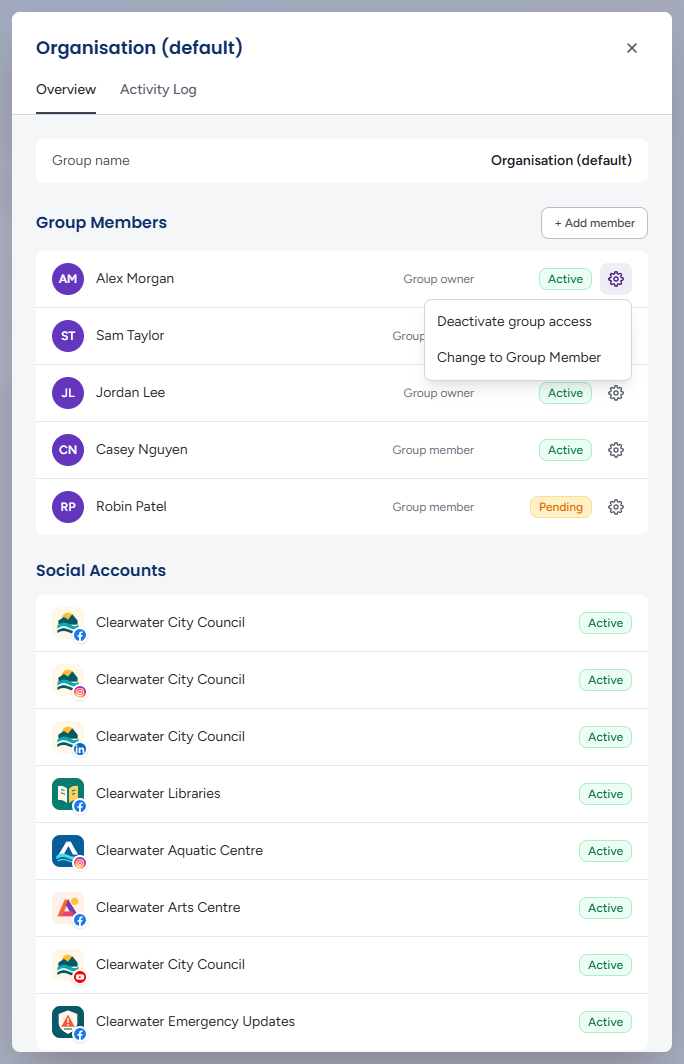
The cog beside each member opens a menu whose options depend on their status:
- Active members — Deactivate group access (takes away their access to this group's accounts without touching their other groups or their Brolly login), plus Change to Group Member for an owner or Change to Group Owner for a member
- Inactive members — Activate group access
- Pending members — Re-send invite and Remove (in red; cancels the invitation)
A group must keep at least one active owner, so Change to Group Member is not offered to the last one. Menu actions apply immediately — there is no confirmation step.
Moving Accounts Between Groups
Accounts are moved from the Accounts page, not from the group: open the account and choose Change group, then pick the new group from the list — see Managing Social Accounts. The account's records are visible to the new group's members from then on.
Activity Log
The Activity Log tab shows changes to the group — created, renamed, members and accounts added or removed, members activated or deactivated, invitations re-sent, role changes — grouped by day with who made them. "No activity recorded yet." until there is some.
Tips
Agencies and large organisations: create one group per client or department so each team only sees its own accounts.
Elected officials: put each councillor's or minister's page in its own group with just their staff as members, so their records are archived in the organisation's account without the whole team seeing them.
A member of several groups sees the combined records of all of them — check the Groups count on the Team page if someone can see more than expected.
Make one person a Group owner in each group so day-to-day membership changes do not need an organisation Owner.