Managing Team Members
Invite people to your organisation, understand the Owner and User roles, and manage each member's groups and access from their drawer.
Overview
Settings → Team is where you invite people into your Brolly organisation, decide what they can do, and remove their access when they leave. What each person can see is controlled through permission groups, so this page works hand in hand with Managing Groups. Brolly plans include unlimited team members, so there is no cost to inviting a colleague.
How to Get There
- Click Settings in the left sidebar
- Click Team beneath it
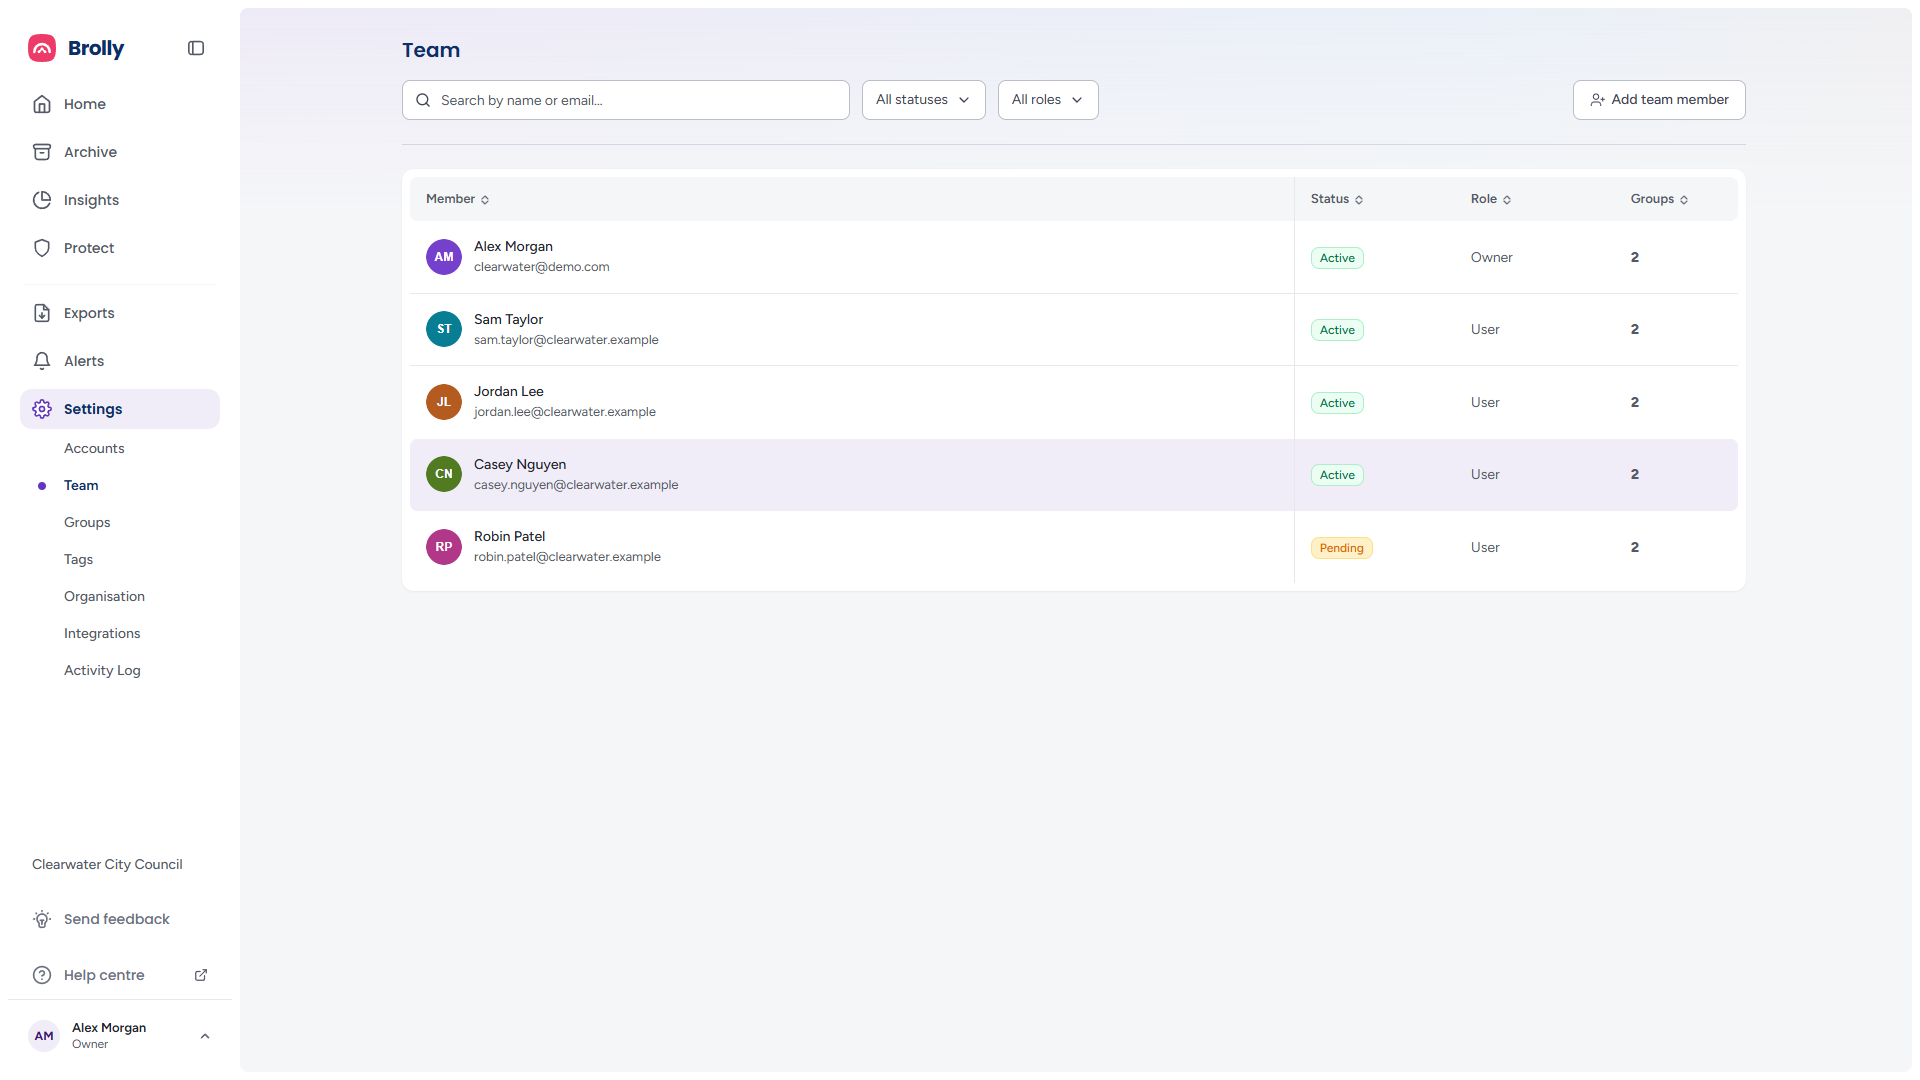
The Toolbar

- Search by name or email… — the list narrows as you type
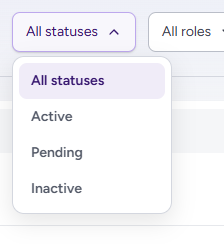
- All statuses — Active, Pending or Inactive members
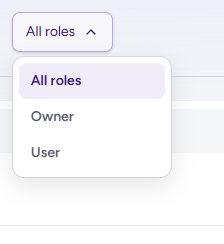
- All roles — Owner or User
- Add team member — invite someone
A Clear button appears beside the dropdowns once anything is set, and resets the search and both filters. If nothing matches, the table shows No members found — "Try adjusting your filters or search term" — with a Clear all filters link.
The Team Table
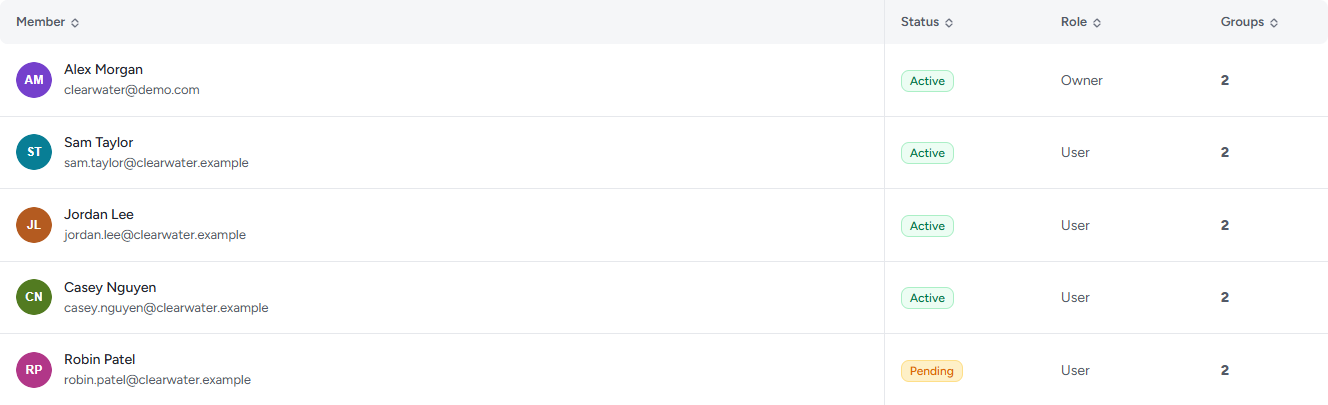
- Member — name and email address
- Status — Active, Pending (invited, not yet signed in) or Inactive (deactivated)
- Role — Owner or User (see below)
- Groups — how many permission groups the member belongs to (not shown for organisations without the Groups add-on)
Click a heading to sort — the arrow shows the direction — and click a row to open the member's drawer.
Roles and Permissions
Brolly has two system roles, chosen when you invite someone and shown in the drawer as System role:
- Owner — full access to manage accounts, groups, settings and team members
- View only — can view accounts, records and reports but cannot make changes. Shown as User in the table and filters
Settings is for people who manage the organisation or a group. An organisation Owner sees every page under Settings. A Group owner sees a restricted Settings menu — Accounts, Team and Activity Log limited to the groups they own, plus Groups where the organisation has that add-on. A User does not manage settings, so if you cannot see Settings in your sidebar and believe you should, ask one of your organisation's Owners to check your role.
Within each permission group a member is either a Group owner or a Group member; that is set per group and shown in the member's drawer and in the group's drawer. In Organisation (default) the group role is the system role itself (Owner or User). The groups a member belongs to decide which accounts' records they see — see Managing Groups.
Inviting a Team Member
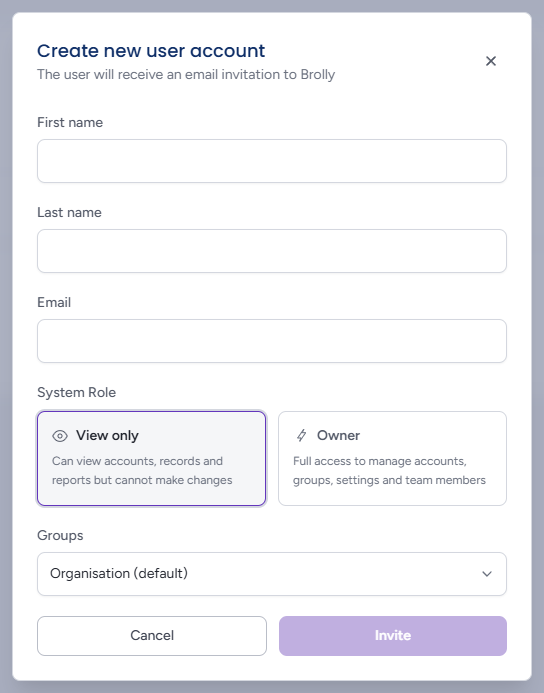
- Click Add team member — the Create new user account dialog opens ("The user will receive an email invitation to Brolly")
- Enter their First name, Last name and Email
- Choose a System Role — View only or Owner; View only is selected to begin with
- Under Groups, choose the groups they should start in. The dropdown is a tick list — the first group (usually Organisation (default)) is ticked already; tick more and the field reads "2 groups selected"
- Click Invite, or Cancel to close without inviting
Invite stays greyed out until an email address is entered, and reads Inviting… while the invitation is sent. If it fails — for example the address has already been invited — the reason appears in red above the buttons and the dialog stays open. Clicking the dimmed page behind the dialog does not close it, so a half-filled form is not lost; use Cancel, the × or Escape.
They receive an email invitation and appear in the table as Pending until they sign in for the first time. Organisations without the Groups add-on do not see the Groups field; the invitation lands in the one group.
The Member Drawer
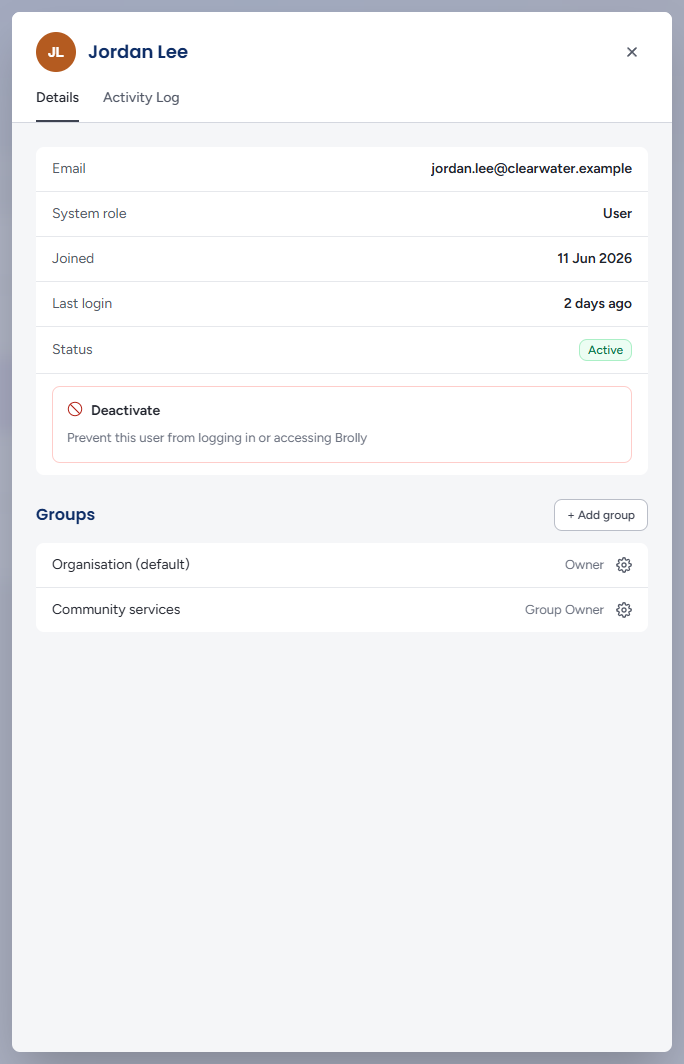
Clicking a member slides a panel in from the right with their name at the top and two tabs, Details and Activity Log. Close it with the ×, Escape, or a click on the dimmed page. The open member and tab are kept in the page's address, so Back and a shared link return to the same drawer.
Details
The top card shows Email, System role (Owner or User), when they Joined, their Last login (relative while recent — "Just now", "3h ago", "2 days ago" — and a date after 30 days; a dash if they have never signed in) and their Status badge, followed by the action tiles for that state.
Status and Actions
- Active members — Deactivate: "Prevent this user from logging in or accessing Brolly". Their history is kept and they can be reactivated later
- Inactive members — Activate: "Restore this user's access to Brolly"
- Pending members — Re-send invite ("Send a new invitation email to this user"), Copy invite link ("Share the invitation link directly") and Remove ("Cancel this invitation and remove the user")
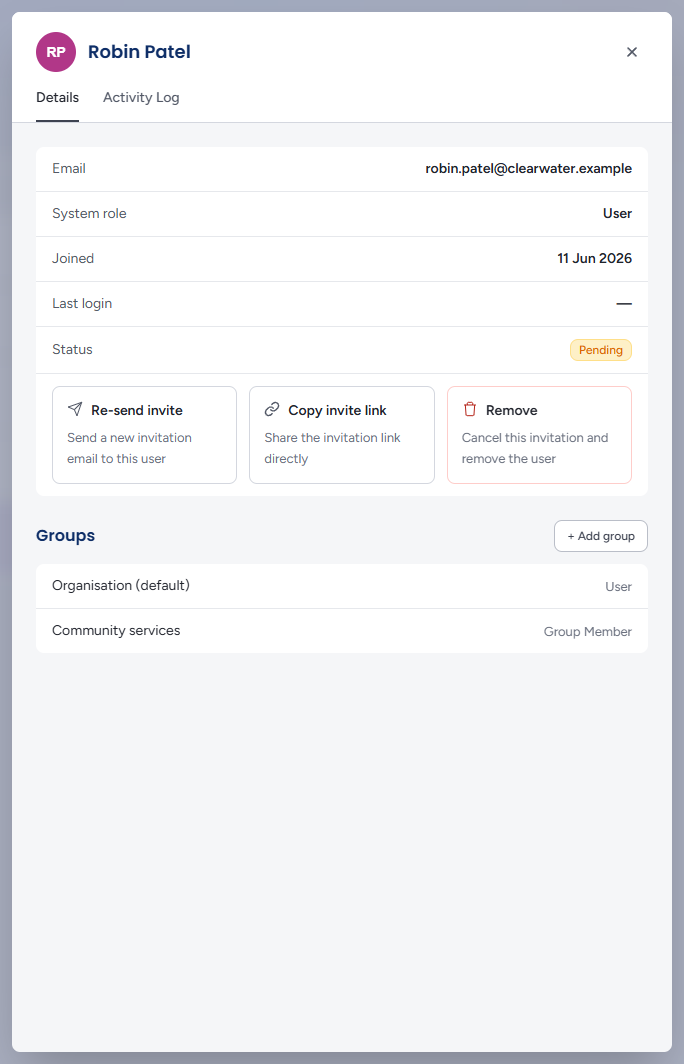
Copy invite link acts at once: it puts the member's invitation link on the clipboard and the tile reads Link copied for a moment (or Couldn't copy if the browser refused), so you can send the link by hand when the email has not arrived. The existing link keeps working.
The other tiles open a confirmation panel over the drawer, with the member's name and what will happen:
- Deactivate user — "This will prevent the user from logging in or accessing Brolly. Their data will be preserved and they can be reactivated at any time." Optionally Add notes for the audit log, then Confirm deactivate
- Activate user — "This will restore the user's access to Brolly. They will be able to log in and use the platform immediately." Optionally add a note, then Confirm activate
- Re-send invite — "This will send a new invitation email to the user. The previous invitation link will be invalidated." Then Re-send invite
- Remove user — "This will cancel the pending invitation and remove the user from the group. The invitation link will no longer work." Then Remove user
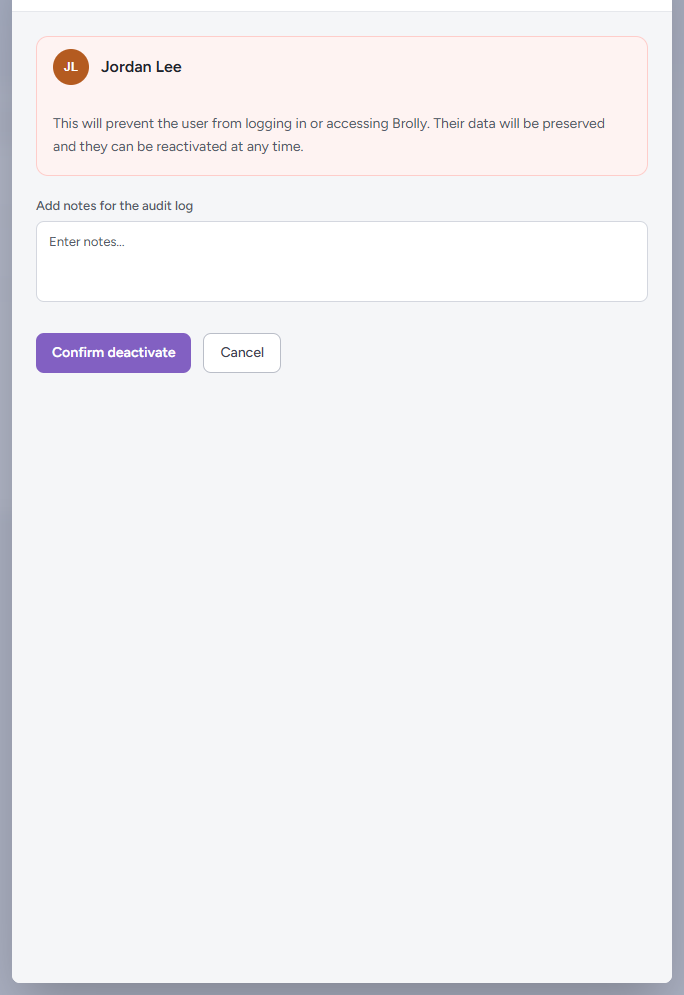
Cancel, the ← arrow or Escape returns to the drawer without acting. If the request fails, a red message such as "Could not update the member status" appears at the top of the drawer.
Groups
Below the details card, Groups lists the groups the member belongs to, each with their role in it — Owner or User in Organisation (default), Group Owner or Group Member elsewhere. A member in no groups shows "Not a member of any groups".
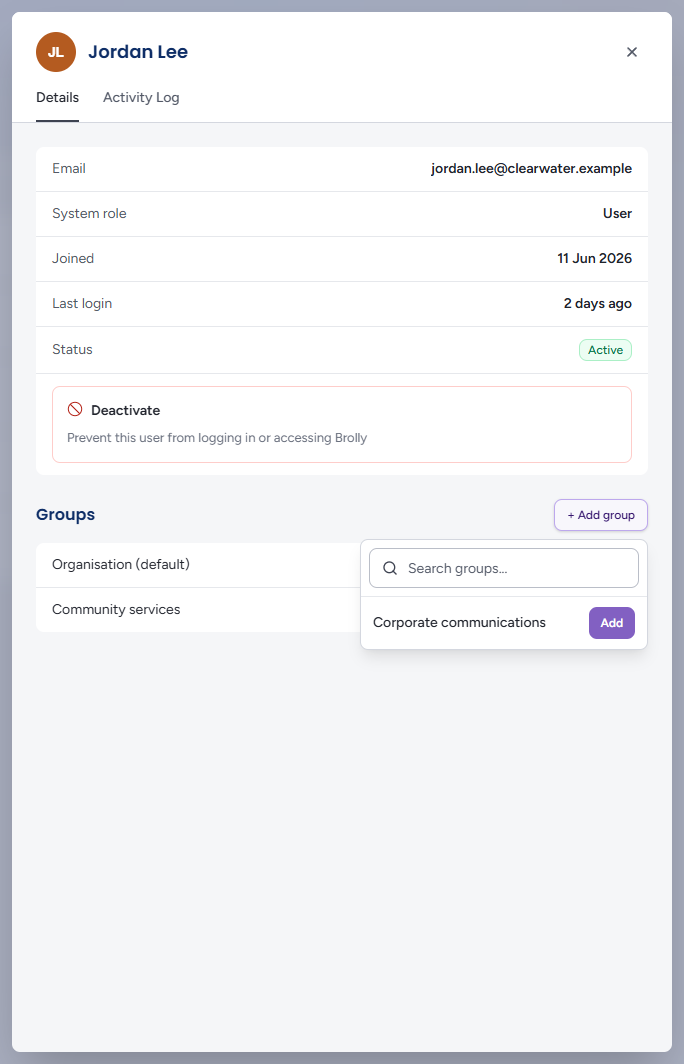
+ Add group opens a small list of the groups the member is not yet in, with a Search groups... box and an Add button beside each ("No groups available" when there are none left). Clicking Add asks for their Role: in that group — Owner or Member — and the × backs out. Choosing a role adds them immediately.
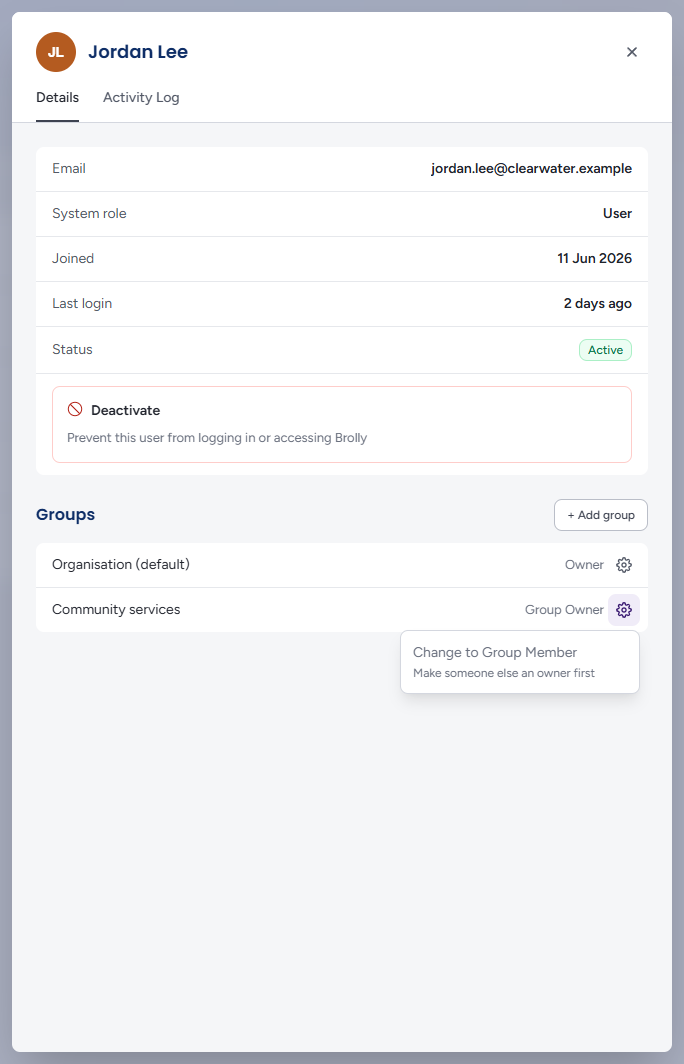
A cog beside a group row lets you switch the member's role in that group — Change to Group Member / Change to Group Owner, or Change to User / Change to Owner in the default group. The cog is not shown on your own row, on a Pending or deactivated membership, or in a group you do not manage. A group's last owner cannot be demoted: the option is greyed out with "Make someone else an owner first".
To take someone out of a group, open the group on the Groups page and use the cog beside their name — see Managing Groups.
Activity Log
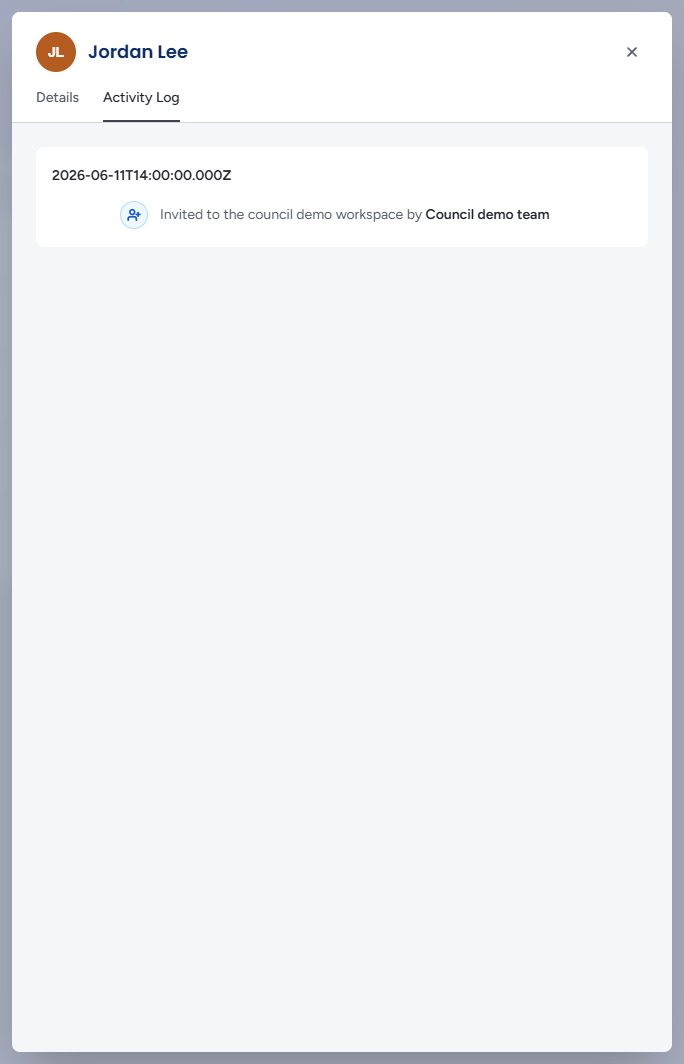
The member's own history, grouped by day — invited to Brolly, made active, role changes, sign-ins — with who did each. "No activity recorded yet." until there is some.
Tips
Deactivate rather than remove when someone leaves: their past actions stay attributed to them in the Activity Log.
Give most people View only and control what they see through groups; reserve Owner for those who manage settings and accounts.
A member stuck on Pending has not accepted their invitation — open them and Re-send invite, or use Copy invite link and send it yourself.
If your organisation requires two-factor authentication, members are simply emailed a code at each sign-in — there is nothing to install or enrol. See Organisation Settings.