Organisation Settings
Set your organisation's name and timezone, require two-factor authentication for everyone, and set up single sign-on with your identity provider.
Overview
Settings → Organisation holds the settings that apply to your whole Brolly organisation: how it is named, which timezone it works in, whether every member must use two-factor authentication, and whether your team signs in through your organisation's identity provider instead of Brolly passwords. The page is three cards — General, Security and Single sign-on — each saved separately. Only an Owner manages these settings.
How to Get There
- Click Settings in the left sidebar
- Click Organisation beneath it
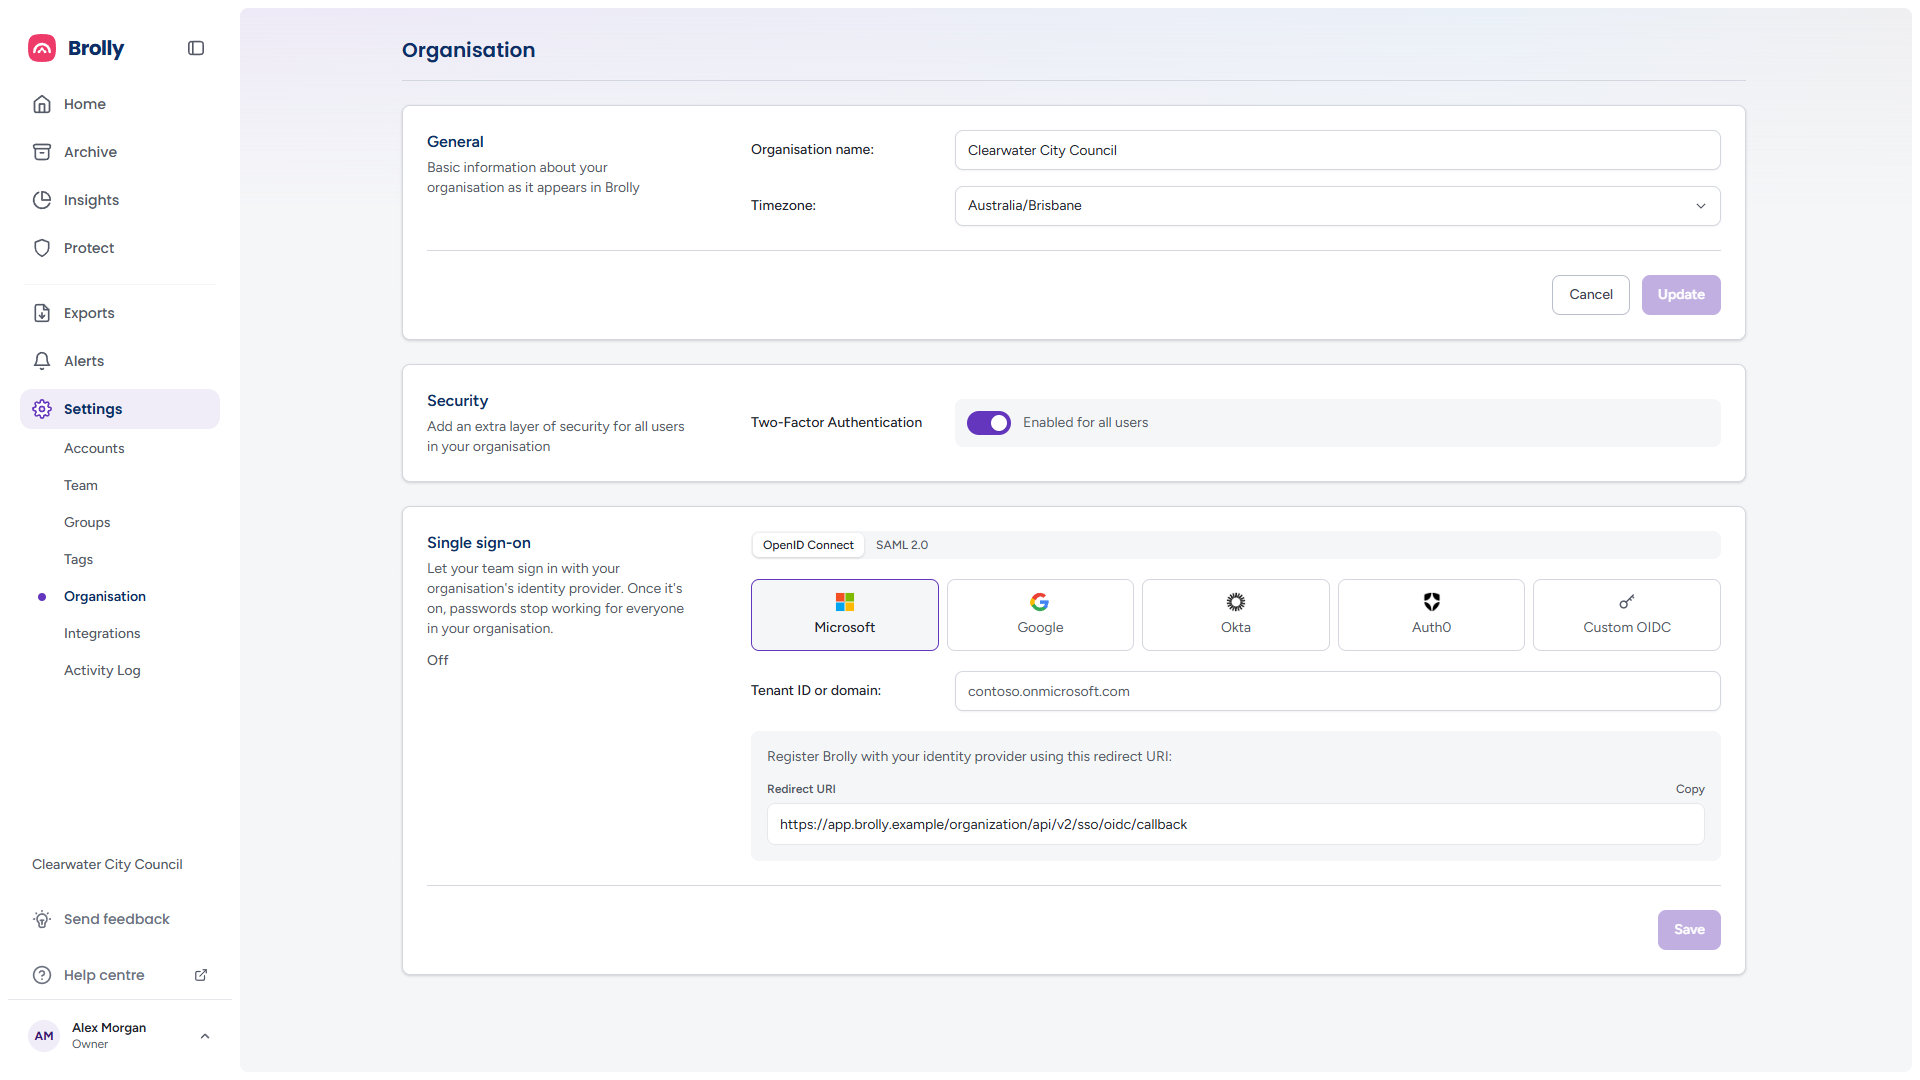
If the page cannot load it shows Unable to load organisation with the reason and a Retry button.
General

"Basic information about your organisation as it appears in Brolly":
- Organisation name — how your organisation appears throughout Brolly and in exports
- Timezone — a list of world timezones (for example Australia/Brisbane); it is used for every date and time in the archive, exports and the activity log
Edit a field and click Update to save, or Cancel to put both fields back to their saved values. Update stays greyed out until something has changed and reads Updating… while it saves; if the save fails, the reason appears in red beside the buttons and your edits stay in the fields.
Security

"Add an extra layer of security for all users in your organisation." The Two-Factor Authentication switch turns 2FA on or off for everyone at once — it is managed at the organisation level, not per person — and the label beside it shows the current state: Enabled for all users or Disabled for all users. The change takes effect immediately; there is no save button.
What your team experiences once it is on:
- They still sign in with their email address and password as usual
- They are then asked for an additional verification code before they can get into Brolly; Brolly sends them the code, and once it is entered they are signed in as normal
- The next time each member signs in after you enable the setting, they are taken through this step automatically — there is nothing for individual members to set up first
Two-factor authentication significantly reduces the risk of unauthorised access even if a password is compromised, and is recommended by the Australian Cyber Security Centre for all online services. If a team member has trouble signing in after it is enabled, contact support@brolly.com.au.
While single sign-on is on (below), the switch is greyed out and reads "Sign-in security, including multi-factor, is handled by your identity provider while single sign-on is on" — your identity provider owns multi-factor then, so Brolly's setting has no effect. The Security card is only shown to organisations whose plan includes the two-factor policy.
Single Sign-on
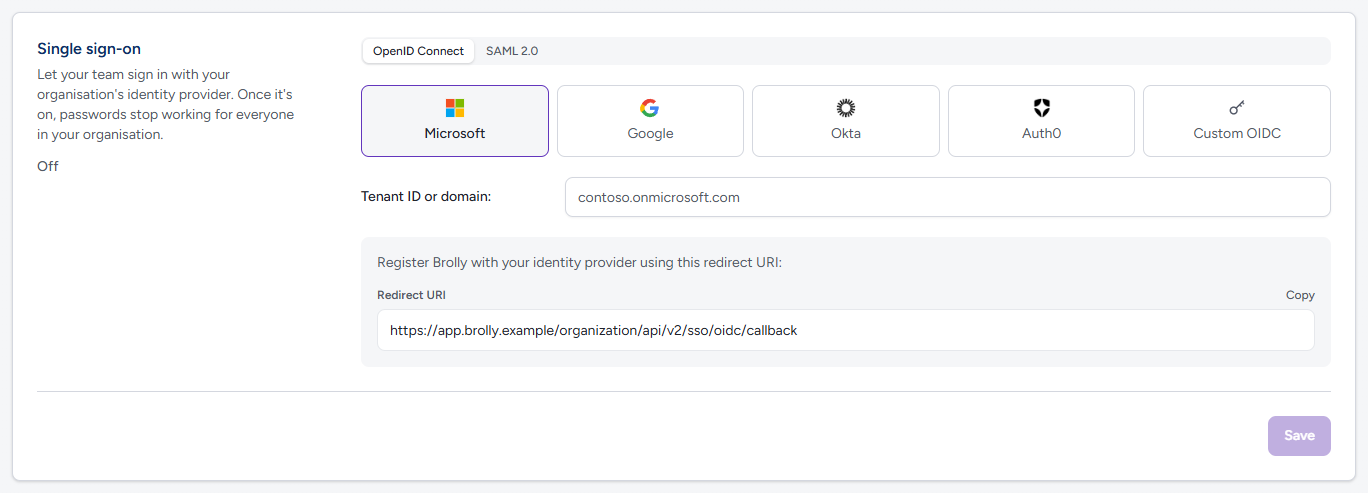
"Let your team sign in with your organisation's identity provider. Once it's on, passwords stop working for everyone in your organisation." The card's current state is shown beneath that description: Off until a configuration is saved, then On — Microsoft (or whichever provider, or On — SAML 2.0).
Setting It Up
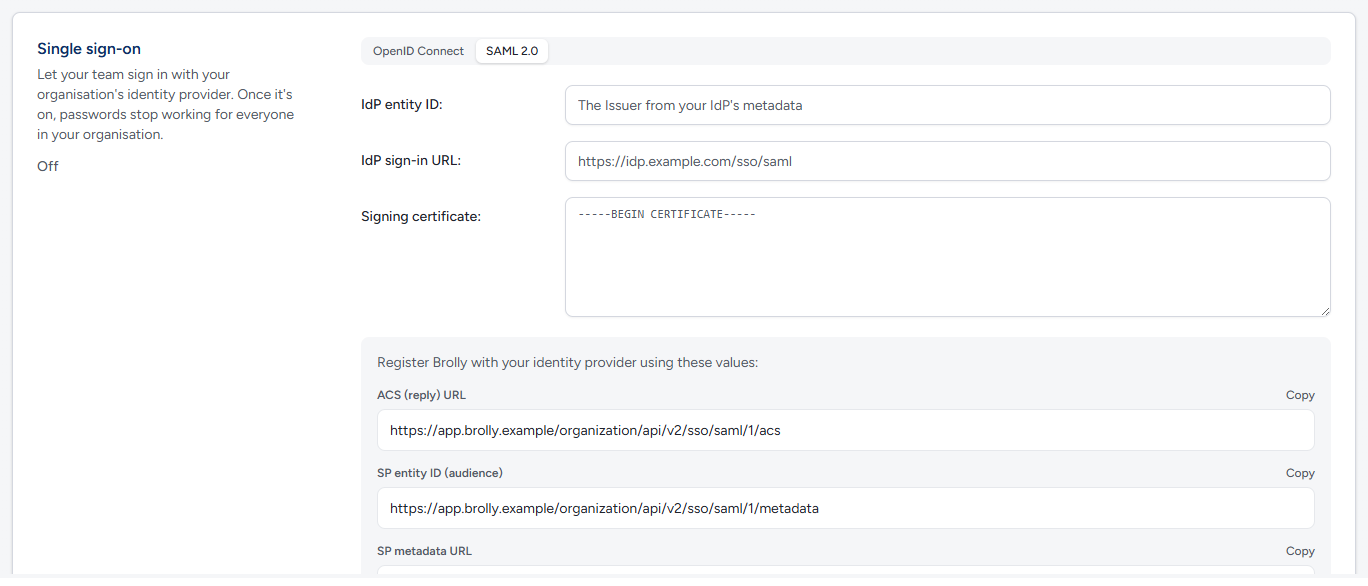
- Choose the protocol your identity provider uses with the OpenID Connect / SAML 2.0 toggle. The fields below change with the protocol
- For OpenID Connect, choose your provider from the tiles: Microsoft, Google, Okta, Auth0 or Custom OIDC for any other OpenID Connect provider
- Fill in what the provider needs:
- Microsoft — Tenant ID or domain (for example contoso.onmicrosoft.com)
- Google — Google Workspace domain (your-company.com)
- Okta — Okta domain (your-org.okta.com)
- Auth0 — Auth0 domain (your-tenant.au.auth0.com)
- Custom OIDC — Issuer URL, Client ID and Client secret. When a secret is already stored the field says "Leave blank to keep" it, so you only re-enter it to change it
- SAML 2.0 — IdP entity ID (the Issuer from your identity provider's metadata), IdP sign-in URL and the Signing certificate, pasted in full
- Register Brolly with your identity provider using the values in the grey box. For OpenID Connect it is one Redirect URI; for SAML it is the ACS (reply) URL, SP entity ID (audience) and SP metadata URL. Each has a Copy button that reads Copied for a moment
- Click Save. It stays greyed out until every required field is filled and reads Saving… while it works
Turning It On
The first time you save, Brolly asks Turn on single sign-on?: "Everyone in your organisation will sign in through Microsoft, and passwords will stop working. People already signed in stay signed in until their session ends. Make sure you can sign in through Microsoft first." Click Turn on single sign-on to proceed or Cancel. Later saves of an already-enabled configuration apply straight away.
Turning It Off
Once a configuration is saved, a Remove button appears beside Save. It asks Remove single sign-on?: "Your team will sign in with their Brolly passwords again. Anyone who never set one will need to use "Forgot password?"." Click Remove to confirm or Cancel.
If a save or removal fails, the reason appears in red beside the buttons. The Single sign-on card is only shown where single sign-on is available for your organisation.
Tips
Enable two-factor authentication — it protects your archive even if a team member's password is compromised, and the change is recorded in the Activity Log.
Set the timezone to where your team works so timestamps in exports match your other records.
Your plan and add-ons are not managed on this page — see Your Plan, Trial and Add-ons. Some organisations see a read-only Plans and Billing card here listing their Current plan, connected Accounts and Active users; nothing on it can be changed.